Cloud & Network automation challenge: AWS, Terraform and FastAPI – part 2/3
This part of the challenge will cover the setup of the infrastructure at AWS with Terraform, and since I’m a fan of Python I will use/learn FastAPI for web front server effect, plus a picture embedded in the served web page will come from a secured S3 bucket.
All of this was part of this great training course Networking in Public Cloud Deployments. We will create all the basic infrastructure from your PC just to follow the training course and gain the fundamental knowledge that we will need for what is to come.
At some point I had to divert from the LABs just because I already had my idea of what to add here, and that part will be in the next post.
So now we will deploy the infrastructure in an IaC style, and in the next post we will change the security rules to allow access to the web app.
Repository with the code here
Let’s go!
In this whole post we will be working only in the folder ./aws_setup/ of the repo
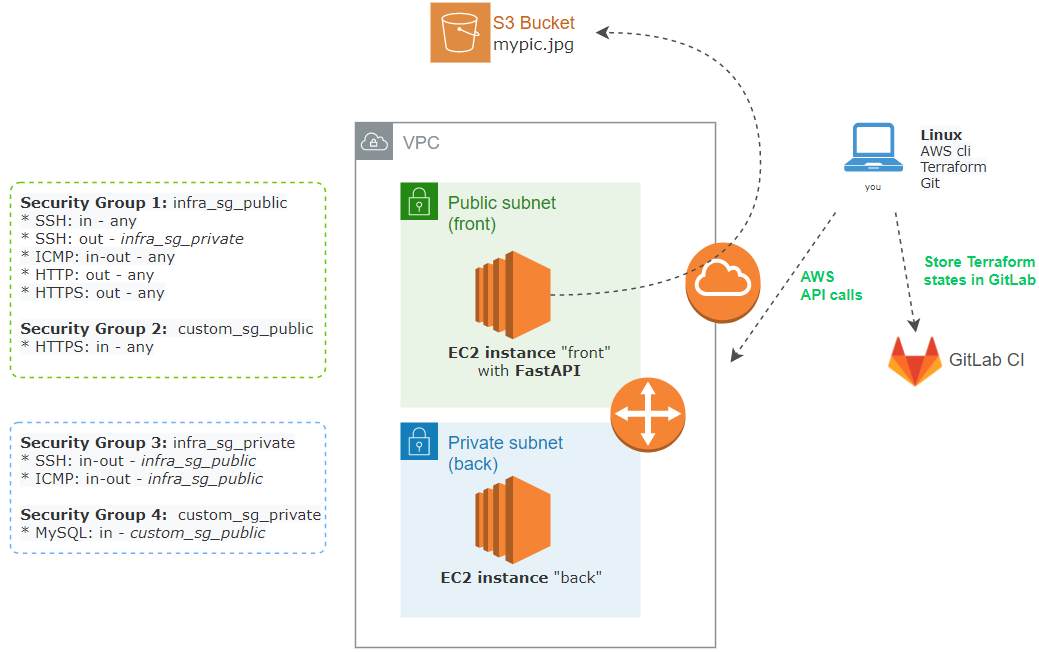
1.- AWS (VPC, EC2, S3, IAM, Security)
We will declare in this section the infrastructure and in the next section we will start coding it in Terraform files:
- Create a VPC with two subnets, front and back
- In EC2 deploy 2 servers, web front, and app back.
- Secure them with Security Groups for admin, WEB, and front-to-back access.
- Store a picture in an S3 bucket.
- Protect the S3 bucket with a special policy to making it accessible ONLY by the public IP of the front VM.
Now if you don’t have one, create an AWS security credential to be able to access AWS programmatically.
You can do that in the AWS IAM console -> your userID -> Security Credentials -> Create Access Key. Take note of the keys. Check this link if you need help.
Finally, install and configure AWS cli on your PC. You will need the credentials from the last paragraph and in the end, you will have 2 files created on your PC at $HOME/.aws/
(optional: it is a good practice to not use AWS root account since it will force you to learn about all the roles. I warn you, is long and boring, but someday you will need to go there anyway)
2.- Terraform (with remote backend and basic provisioner)
The Terraform states will be stored remotely at GitLab. It is not convenient to store them on a single server because if you lose them, you have a big problem for your IaC plans, basically, you just lost them 🙁
If you don’t know about Terraform check the getting started tutorials for the fundamentals, they are really clear and short.
In Terraform you can write all your Infrastructure as Code in one file or spread it in several files while giving them names like networking.tf, instances.tf, etc. That is what i’m going to do here.
Check the repository in the folder ./aws_setup/ to read the complete files, and here some comments about each one:
- aws_setup.tf: just a short setup with AWS region and an SSH key that we will need to install in the instances in order to access them later.
- backend.tf: to specify that we will use a remote HTTP service to store the terraform states files.
- networking.tf: all the networking definitions about VPC, internet gateway, subnets and route tables.
- instances.tf: has all the definition of the 2 instances we will use:
- Create the SSH keys, provision them to the instances and store locally just to be able to use it while you test this configuration.
- The VM type and SO (all free tier).
- Subnet association.
- Get a public IP for the front VM.
- Assign security groups.
- Run some commands to install some software packages like FastAPI
- Upload some files needed for its function like the FastAPI code, and Linux service definition to start FastAPI via Systemd.
- Later on you can connect to the instances with
ssh -i id_rsa_aws.pem ubuntu@ip
- s3-bucket.tf: where we create the S3 bucket, upload the picture and attach a policy to secure it from external access.
- outputs.tf: finally which variables to capture and print to screen after Terraform is run.
./aws_setup/ is the code to startup the AWS infrastructure with Terraform while storing the managed states in GitLab managed states.terraform.tfvars.There are 2 ways to use GitLab managed Terraform state.
- launching Terraform from the local machine and storing in GitLab with the http backend
- use GitLab CI (pipelines)
This post will use ./aws_setup/ setup directory of the repo with option 1 to setup the LAB, while the next post will use the root directory ./ of the repo and use method 2, to read the Terraform states created at the setup time, and modify security rules with the pipeline.
(For more details check https://docs.gitlab.com/ee/user/infrastructure/terraform_state.html)
To store the states in GitLab first you need to generate your personal GitLab access token, go to GitLab and Click your avatar upper-right corner -> preferences -> access tokens -> name, expiration date and API as scope.
Now get your GitLab project ID and Name from settings -> general
Let’s start the build.
First clone the repository to your PC with git clone YOUR_REPO_URL
Now get into the setup directory with cd ./YOUR_REPO/aws_setup
And finally, replace your information in the following script and execute it. This will setup your local Terraform directory to store the states at GitLab.
terraform init \
    -backend-config="address=https://gitlab.com/api/v4/projects//terraform/state/" \
    -backend-config="lock_address=https://gitlab.com/api/v4/projects//terraform/state//lock" \
    -backend-config="unlock_address=https://gitlab.com/api/v4/projects//terraform/state//lock" \
    -backend-config="username=" \
    -backend-config="password=" \
    -backend-config="lock_method=POST" \
    -backend-config="unlock_method=DELETE" \
    -backend-config="retry_wait_min=5"
*to update your GitLab API password you can manually edit .terraform/terrafom.state or re init terraform with the above cmd
*For YOUR-STATE-NAME you can use your project name, but it could be another custom name. The script use the project name, if you change it, change accordingly at the end of the variable TF_ADDRESS of the pipeline .gitlab-ci.yml.
You should see something like this showing the initialization complete:
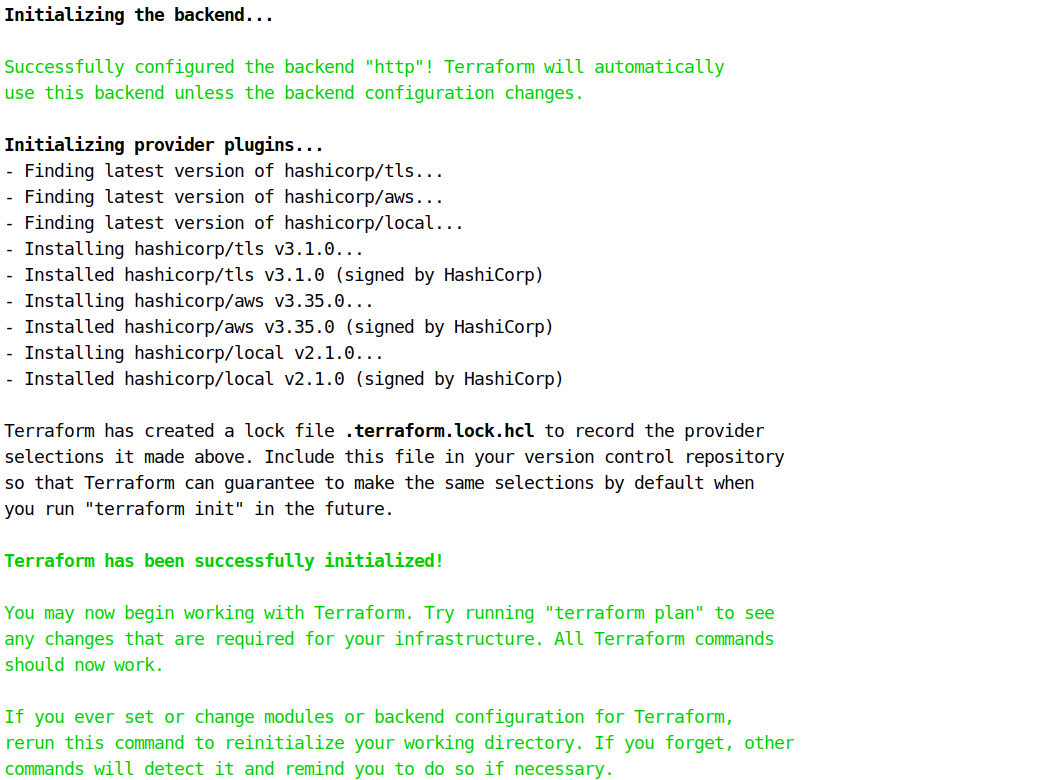
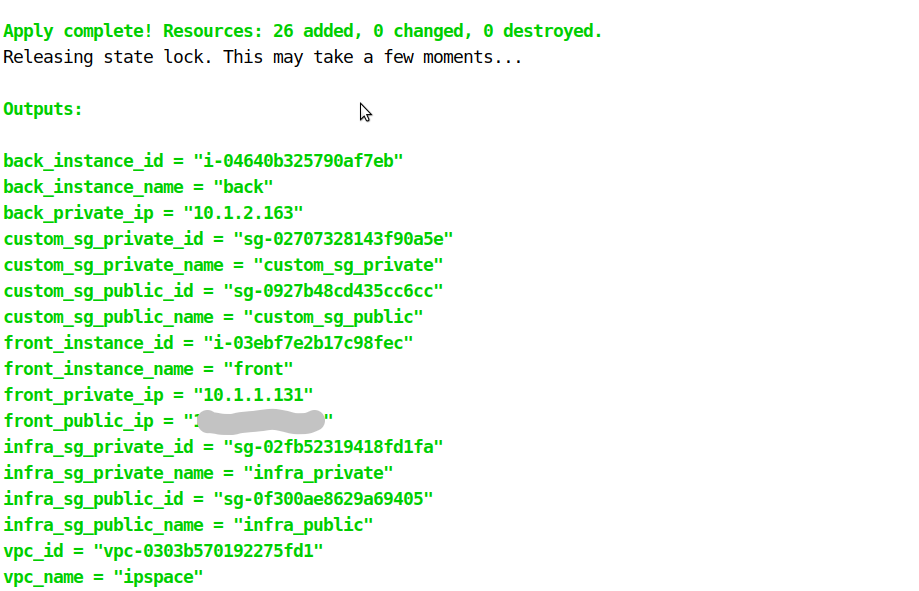
Now run terraform plan to check what is going to happen, and then run terraform apply. Confirm the apply and It will take like 5 minutes to complete. Not bad for building the whole infrastructure!
You should have several useful outputs (defined in the output.tf file), one of them is the public IP address of the front VM. Take note of the public IP.
Finally, you can check your GitLab Terraform states in GitLab at Operations -> Terraform
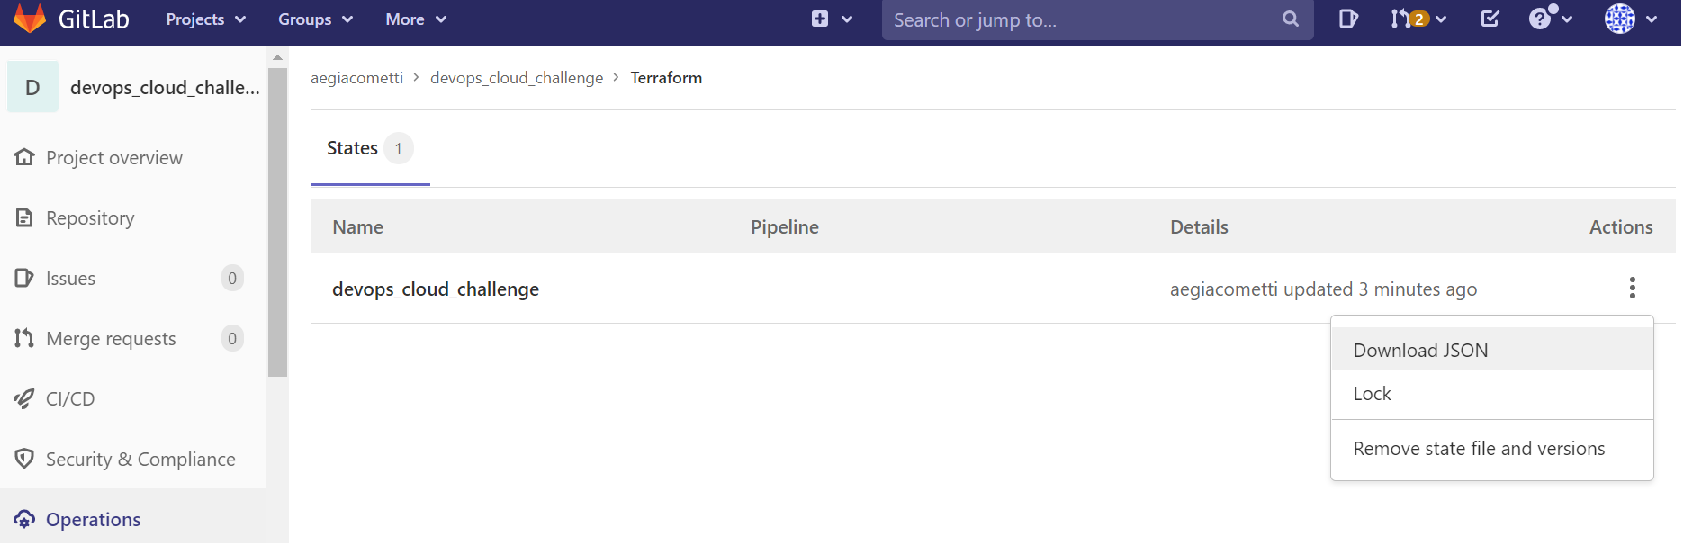
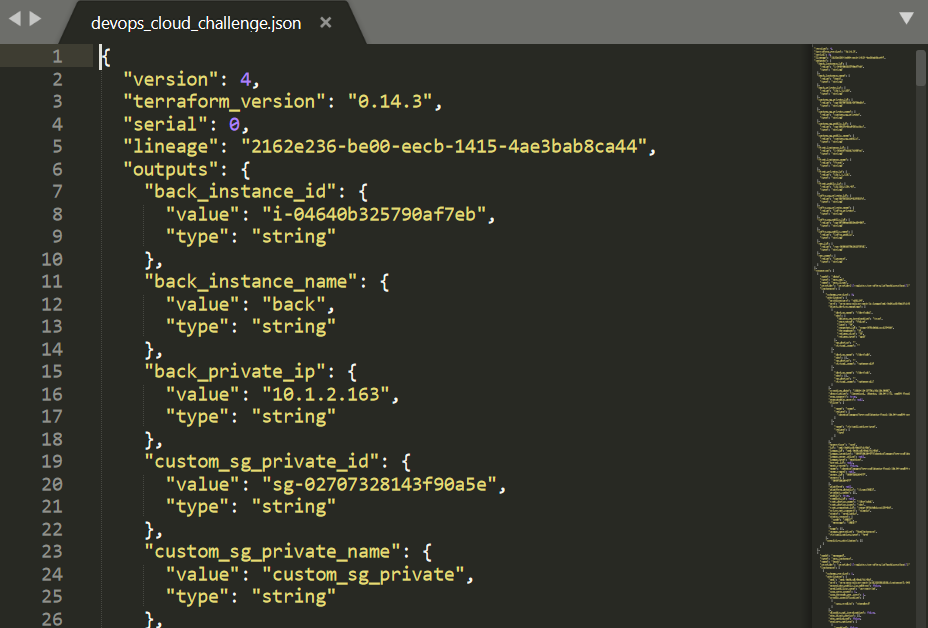
And if you download the JSON file, you will see the whole terraform state in JSON format
3.- FastAPI
Since I had on my bucket list to learn something about FastAPI, I decided to do the WEB part with it. If you know some Python is extremely easy to start following the first steps tutorial.
Basically, I create a route to "/" which will return an HTML code of the web page. In the middle, it has to download the picture from the S3 bucket that is pointed in the HTML code and serve it.
Check the code at ./aws_setup/web_api/main.py
4.- Test
- PING to the public IP address from the output of the command
terraform apply. It should work. - Also you could try to connect to the instance using this command
ssh -i ./id_rsa_aws.pem ubuntu@INSTANCE_PUBLIC_IP. And from there also ssh jump to the back instance. Check the output for the private IP address. It should work. - And finally try to access the web page with the public IP address, this will NOT work, since I used the wrong TCP port as 8000, and we are going to correct that with the pipeline in the next post. Which in the end is the objective of this whole PoC. Wait for it … 😉
Reminder: to delete all the created resources at AWS, run terraform destroy -auto-approve after each session, so we keep this free. If you forgot to do it, you will be charged by it’s up time.
Next part here.
Thanks for reading.
Adrián.-